

Can A Solenoid Valve Be Repaired

The web'southward mother lode of complimentary irrigation information!
How to Repair a Irrigation Solenoid Valve
When a solenoid valve (likewise called an electrical valve or automatic sprinkler valve) fails to close it is almost always considering something is stuck inside information technology. This might exist a grain of sand, a small twig, a insect, or even a tiny snail. To ready the valve you need to disassemble and clean it. When a valve fails to open it is usually due to a bad solenoid or bad wiring, although in rare cases a grain of sand stuck within the valve or a ripped diaphragm inside the valve. The following education tell how to detach, make clean, and audit the automatic valve.
To make clean the valve:
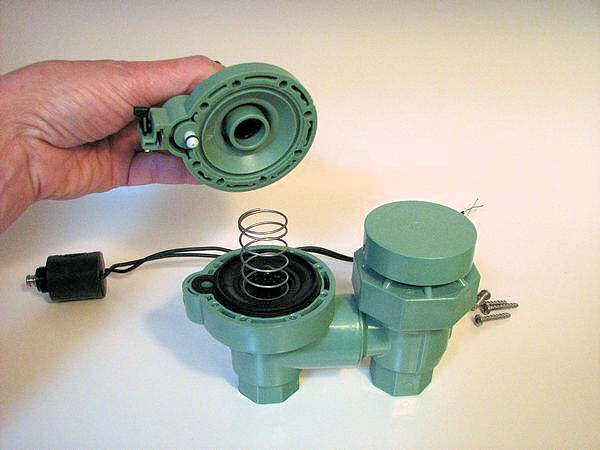
Every bit you disassemble the valve exist sure to note how all the parts fit together and then you tin can get information technology dorsum together correctly! I strongly suggest you brand a sketch and take notes. Each brand and model of valve is slightly different. The valve shown in the photos here is an anti-siphon type valve, which is a type usually used on abode sprinkler systems. The cap construction on the correct side of this valve is the anti-siphon device.
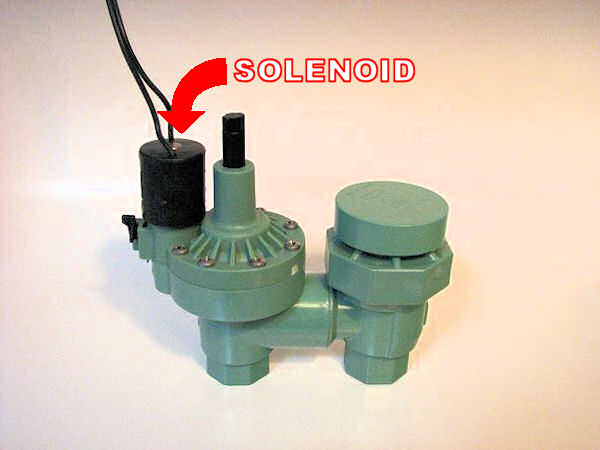
Typical Anti-Siphon Type Solenoid Valve
Remove the solenoid from the valve. Nigh solenoids unscrew counter-clockwise to remove. When removing the solenoid watch that the spring loaded plunger inside it does not pop-out and autumn into a mud puddle. On most newer valves the plunger is held "convict" so information technology won't fall out when the solenoid is removed, but sometimes even those ones come loose. One time the solenoid is removed, button in on the end of the leap-loaded plunger in the solenoid. It should spring gently back out when released, and it should slide in and out smoothly when pressed several times in a row. If the plunger doesn't move hands and smoothly, supersede the solenoid; it is damaged and can't be repaired. Exercise not apply any oil or lubricant to the solenoid plunger, if it is sticking information technology is non repairable, supplant information technology.
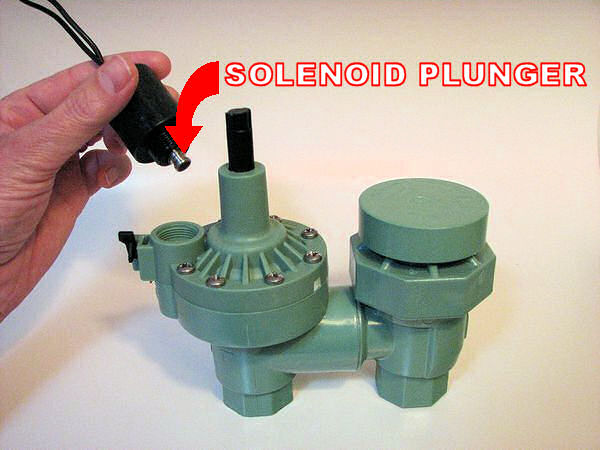
Solenoid Removed, Showing Plunger
Remove the valve lid, most are held in place by several metal screws. Some models of valve take lids that screw off like the top of a jar, plow counter-clockwise (lefty losey) to remove this type of lid. You lot may need to use a strap wrench to remove the jar-top style lids. All valves have a leap under the hat, don't permit information technology fall out into the mud! Remove the spring and set it aside.
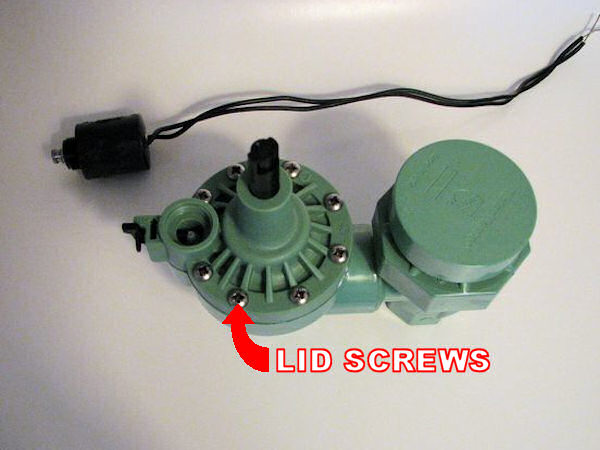
Valve Chapeau Screws
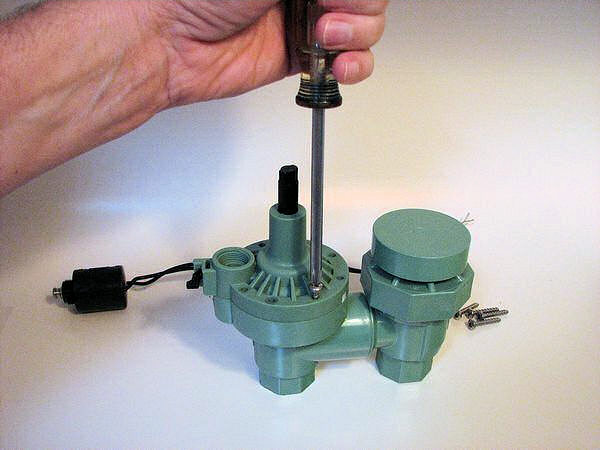
Removing Valve Lid Screws
Watch that the Jump Does Not Fall Out When Removing the Hat
Look for the tiny passages, called "ports", within the valve lid. These ports pb from the lesser of the lid to the area where the solenoid was attached. The exact location of the ports varies with each valve brand and model. Make certain these passages are non clogged with a grain of sand or whatever. Be careful you exercise not scratch or enlarge these passages when trying to get the sand out! Exercise non try to drill out these ports to clean them or brand them larger.
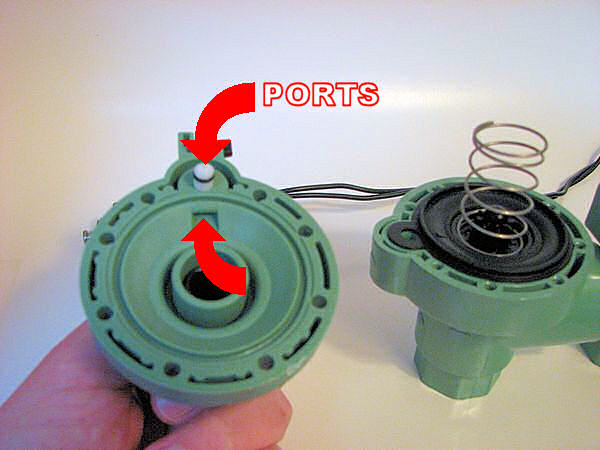
Ports in Hat
Remove the rubber diaphragm from the valve. Make sure it is not cracked or broken, if it is replace information technology. Some valve models likewise have a port in the diaphragm, cheque to see if in that location is 1, if so make certain information technology is clean. On some valves the port in the diaphragm has a metal pin that runs through it, the purpose of the pin is to keep the port clean. The pin should slide freely in the port. The diaphragm in the photo below has a split up, removable seat gasket attached to the bottom of it with a screw. On many valves the rubber seat gasket and the diaphragm are 1 piece and the seat gasket is not removable. Make sure the seat gasket or diaphragm seat does not take anything stuck on information technology, like a grain of sand or twig. If the gasket surface is scratched or torn supersede the gasket or diaphragm.
Examine the valve seat in the bottom of the valve torso. The seat is the function of the valve trunk that the gasket presses confronting to terminate the water menstruum through the valve. Make certain the seat is not scratched or pitted, if it is the valve volition leak when closed. On some valves the seat is replaceable. On some brass valves the seat can be ground downwardly with a special tool to remove pits and scratches. However, for most valves if the seat is scratched or pitted, the valve is not repairable and must be replaced.
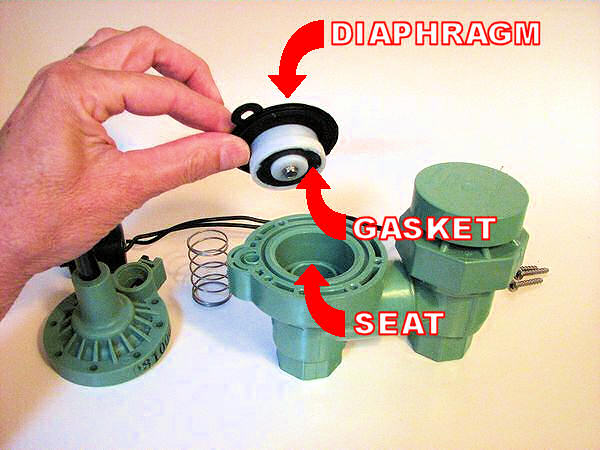
Rubber Diaphragm and Gasket
With the valve disassembled plough on the water to flush whatever remaining sand and crud from the pipes upstream of the valve. Turn it on full blast, and run it for a minute or ii, you lot need to get everything out of that pipe. Turn off the water, and dry out yourself off. I know you don't want to get moisture, only don't skip flushing the pipes and valve torso, this is an important step!
Carefully clean everything, then reassemble the valve. Some valves have a separate hat gasket or o-ring that needs to be cleaned or replaced before existence reassembled. If in that location are any o-rings, I strongly suggest y'all lubricate them before reassembling using K-Y Jelly or a similar product. Lubricating o-rings is optional, but recommended as it keeps them from crimping during associates. If the o-band crimps information technology will be ruined and will leak. K-Y Jelly is a water-based lubricant that you purchase in the feminine hygiene section of a supermarket or drug shop. (Don't inquire for it at the hardware shop unless you want to give the employees a good laugh at your expense. Yeah, I admit I savage for this back when I was beginning starting out in this business, it'southward a favorite plumber gag to send the new guy out to buy the K-Y Jelly!) Do not use vaseline, silicone, oil or any petroleum based products on the valve, they may damage the seals and likewise may clog the ports in the valve.
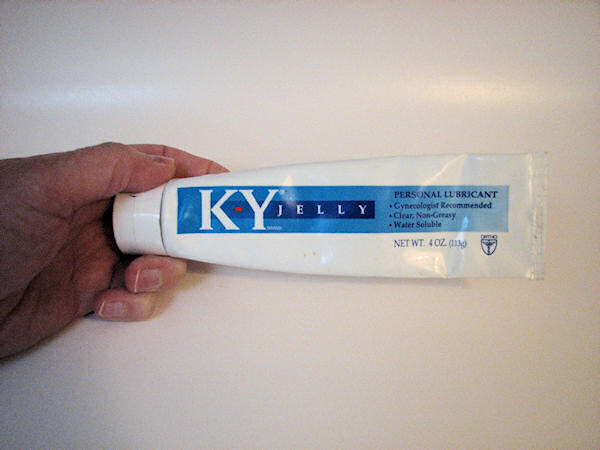
Utilize K-Y Jelly to Lubricate Rubber Parts of the Valve
Do Non Use Petroleum-Based Products!
When attaching the lid, avoid striping out the lid threads and warping the lid as follows: When inserting the screws that hold the cap on, showtime with 1 of the screws next to the solenoid. Insert the screw in the pigsty so turn it counter-clockwise (losey lefty) until y'all feel a slight click equally the screw finds the threads. Then reverse direction (righty tighty) and lightly tighten it. And then insert the second screw on the opposite side of the valve lid. Like the outset, discover the threads then just lightly tighten the screw. Proceed with one spiral on 1 side and the next on the other until they are all in. Now get back and tighten them all, going in the same order you inserted them. Practice non over-tighten the screws on plastic valves, you will strip out the threads.
If yous're blessed and didn't mess up something the valve should work correctly at present.
Suggestion: Your valve has already failed once, chances are that means something in the water got stuck in it, which means there is sand or whatever in the water supply. Consider installing a filter upstream of the valve to keep out the sand and grime in the future. Typically the cost of a valve repair is greater than the cost of installing a filter. See the Irrigation Water Filtration Tutorial.

Text and Images by Jess Stryker unless noted. Copyright © Jess Stryker, 1997-2018. All rights reserved.

Can A Solenoid Valve Be Repaired,
Source: https://www.irrigationtutorials.com/faq/repair-valve.htm
Posted by: riverashmed1979.blogspot.com
0 Response to "Can A Solenoid Valve Be Repaired"
Post a Comment